Wood burning oven built under roof cover
Hi Rado
(Paul’s instructions with images on how to make garden concrete benches.)
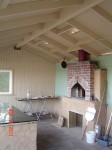
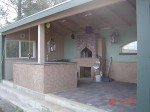
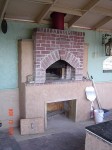
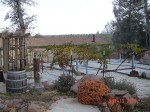
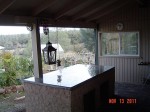
I snapped these photos this morning. This oven is cut into the hillside, we wanted space to play with the dough close to the oven and thought black granite would be the perfect colour and smooth material to work flour on. The island is approximately 8 X 4 feet, which allows for lots of working space. You can see the back of the oven hidden in the rocks and grapevines. I was looking for a low profile design.
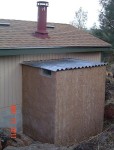
I covered the top of the oven with corrugated metal roofing and also final finished the flooring around the wood burning oven.
More images on the oven and its roof cover.
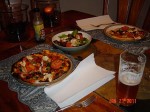
You asked me to send you any photos if I was cooking in my wood-burning oven, I snapped photos of the different steps in the making and cooking. My daughter asked if we could make pizza again because it was so good last time, as you know any cooking takes planning, time and preparation but I wanted to get as much good stuff out of our oven in one fire heat up as possible so Pizza, Lasagna and Bread were all on the menu. Before you get an image of overweight people sitting around a table, let me defend myself by stating the Lasagne and Bread will be consumed a day or so later! “Unless I get late night munches”. I have never cooked Lasagne in a wood burning oven before but my believe was I would be able to insert the skillet while the fire is starting and position it near the opening, then move it just inside to the left or right side while we cook our pizza’s. I needed to make these adjustments as most conventional ovens cook/bake around 375 or 400 degrees range. After cooking the Lasagna and pizza we will bake a few loafs of bread. The breads go in and I spray water in the oven and close the door.
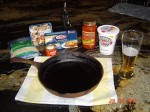
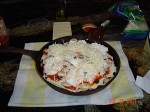
Last time I provided our pizza recipe so I will omit that but I thought I would share the Lasagne. I used a cast iron skillet, rubbed with olive oil, then a layer of sauce in the bottom, a layer of Lasagne pasta (No boiling required) ricotta and mozzarella cheeses, olives, mushrooms and garlic. I repeated these layers three times and covered it with aluminum foil.
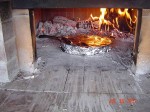
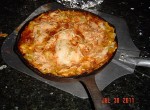
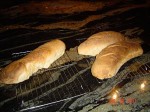
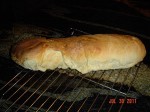
Attached are a few photos of the first French bread we made. The shape took on a form of its own but playing with the oven is all part of the fun. Everyone that eats the food from our wood-burning oven loves the food. The pizzas have that crispy crunch with a wonderful toasty flavor; the bread has the hard crust like the old European style but remains soft and light inside. Our friends, soccer teams family like the party atmosphere that is created as everyone rolls out their own dough and tops there own pizza as a group, its amazing the shapes that some of the kids come up with! Cooking the pizzas only takes 90 seconds, which allows the transformation from making to eating very quick and enjoyable. Our future plans on pizza night will be to have friends make and bring their own bread dough with them; we will launch the bread after eating the pizza as a loaf only takes ten minutes to cook in the wood burning oven. Them each person will trade loafs for fun.
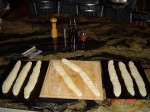
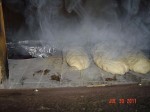
We have cooked Scallops, Salmon and Steel head fish on Cedar soaked wood blanks that are a delight. I will take photos next time I cook and email a few images to you.
* I will forward you some bread recipes I use later, here is our home made pizza recipe which is easy to make and comes out a treat every-time:
Homemade pizza dough recipe
Ingredients:
1 Cup + 2 Tbsp Warm water
1 1/2 Tbsp Extra virgin olive oil
3 1/3 Cup All purpose flour
1 1/2 tsp Active dry yeast
1 1/2 tsp Table salt
1 1/2 tsp Granulated sugar
Hand made directions: Pour warm water and olive oil into a large mixing bowl. Add flour, the remaining three ingredients should be poured into separate corners. Using a wooden spoon or your hands, fully incorporate all ingredients. Once you have a ball of dough, knead on a floured cutting board for 10-15 minutes. Should be smooth a springy.
Bread maker directions: Pour warm water and olive oil. Add flour, then the yeast, sugar, and salt. Set the bread maker to the pizza dough setting and close the lid. When the timer is done remove the dough.
Divide into 4 dough balls and place dough in lightly oiled containers, cover with plastic wrap or a sealed lid and let it rise 1 ½ – 2 hours at room temperature, until doubled in size. Deflate gently by turning 2-3 times. Allow to rest until you start shaping your pizza dough. If you plan to store pizza dough, place in an oiled, air tight container and refrigerate until needed but allow the dough to come to room temperature before working with it.
Tip: Roll or hand shape your dough, sprinkle Semolina flour on a pizza peel ( you can use Cornmeal but cornmeal burns and becomes sticky on the oven hearth ). Place your pizza dough on the peel one inch from the tip. Gently jerk the peel to make sure the dough moves. Lightly coat the top of your dough with olive oil then pizza sauce. This will keep your crust crisp. Top your pizza with all the things you love. Enjoy!
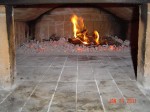
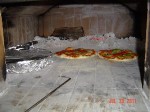
I also emailed you some photos of our wood burning stove; combo pizza oven/masonry heater. The cooking oven is housed in the chimney so the stone heats the food. The chimney runs around the back then down the side of the oven, through the bench seat and up the wall between the heater and the arch ( in other words it snakes through the bench which radiates heat into the rocks ). 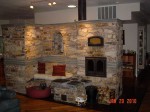
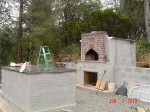 Looking through my photos I thought these might shed some light on the project that might sometimes be over looked. The wood arch to support the arch bricks, it is wedged with small shims that are pulled while the mortar is still wet. Aluminum foil; laid on the high temperature bricks before the concrete is poured, this provides slippage for heat expansion. 4 inches think on the sides, 8 inches thick on the top for extra heat absorption and oven performance. Outer concrete forms the finished concrete shell.
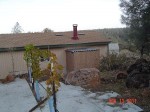
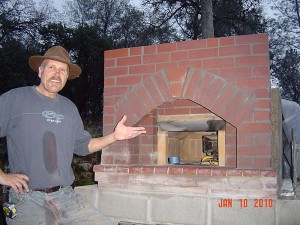
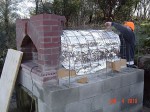 I finished the stucco and the flooring. Back image shows rear of the oven in the vineyard with carpeting to help stop the weeds plus its free. And 12 inches of oven protruding past the wall to the in-side.
 There are many different methods and concerns while constructing a wood-burning ovens. Thanks to website like yours it provides a great resource from people who have been through the red tape with on-hand construction, who are willing to share aid with others providing tips on construction and long term usage results.
Our wood burning oven in Shingletown, California, USA, and the goodies it produces.
Paul
Respond to the Wood burning oven built under roof cover article:
6 Comments
Sorry, the comment form is closed at this time.
Hi, are they restaurant grade? If the are, what will be the cost of installation, labor, material etc. garde
By Sam
What is the cost of building one for a restaurant? Garden Grove – CA
By Sam
Looking for some kind of plans to turn my fireplace into something with the lower part accommodating the fire for heat and including other things and putting some kind of oven over this. Can anyone help with any kind of plans. I will completely tear the fireplace apart and rebuild for this. Thanks
By Ed Rayman
We are a manufacturer of cast iron. We produce bread door, the door to the smokehouse, the door to the furnace, the elements to build a barbecue, other items of cast iron.
Our offer to http://www.halmat.kielce.com or http://www.halmat.eu.
By Paweł
Paul, I love what you’re doing! I am a cooking hobbiest, I am planning on including a wood oven in my new house. I would love to come up and talk with you some time. Tcfarming@yahoo.com Tyler from Red Bluff. Ps. I’ll bring some of my scratch sour dough.
By Tyler
Awesome wood burning oven built under a roof cover to protect us from the rain allowing for even better experience from the whole endeavor. Nice idea to exert oneself to do something extra practical and functional.
By Clementina