Oven in elliptical concrete drainage pipe
Good day.
I found this website and must say, it has been very helpful to me. I just completed my pizza oven in 1 weeks time. But, believe it or not, I’m a little afraid of how big a fire to start with, cooking-wise. I did burn a small one or two for curing of castable dome, but need a little advice on how large a fire to get going. Suggestions? My floor size is 27″ x 30″.
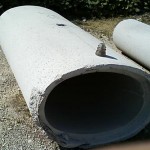 My oven is made from a 38″ = 96.52 centimeters elliptical concrete ( new ) drainage pipe. The pipe is reinforced with metal inside the concrete. I sell sheet metal equipment and metal fabrication tools and actually have sold a few things to folks over in Australia.
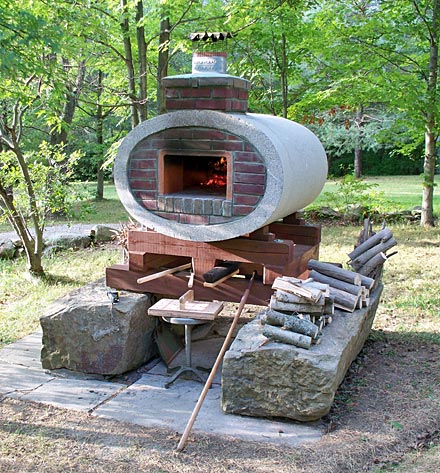
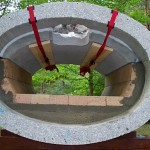
Added by Rado: This is one interesting concept. Did you reach carbon burn off temperature at least partly?, that is if you already fired up higher with a more solid fire. I emailed you details about how to fire up. Carbon burn off always shows as the carbon color starts to disappear. Starting first in the top of the vault ( ceiling ) right above the fire source then it gradually progresses and spreads completely everywhere around the walls inside the oven ( can be as fast as 10-15 minutes from when it first begins till all turns back to white or the original firebrick color. ) I was wondering how your oven behaves. When finished firing you might want to block off the chimney, as I understand it, your flue/exhaust is in the ceiling level? Add some photos of a meal or two. I would like to place them on the website.
Was there any movement on the outside with a temperature soaking through the pipe ( in a later stage, 2-3 hours after firing) or inside in the fire brick lining?
Thanks Mate
—
My second test fire of roughly 300-350 degrees F ( = 149 – 177 degrees C ) in the oven gave me some carbon blacking on the ceiling and the walls. Will fire up much higher next. My flue level is 4″ – 10cm lower then the ceiling height. 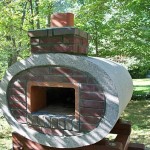 I know the ratio is off a little, and I can compensate by adding a part of the terra cotta doorway material to the underside before the flue. Thus making my opening 9″ = 22.9cm from the original 10 1/2″ = 26.7 cm ( the terra cotta material is 1 1/2″ = 38 mm thick ). That would then increase the dimension difference of the ceiling to 5 1/2 inches = 140cm, which would fall in the correct ratio range for the door height versus ceiling height. But before I do any of that I will get a good fire going and see how it goes. I did see a couple hairline cracks in my castable ceiling, but according to the refractory supplier and a refractory contractor I talked to, both said this is normal for this type of material. Keep in mind my second fire only took up 25% of my floor space. The refractory supplier told me I need to go at least 50% to 75% to get the materials soaking up the heat.
  Both gentleman assured me that the materials I used can handle temps up to 2500 degrees Fahrenheit = 1371.1 degrees Celsius. I just don’t want to screw anything up. ( being protective of my baby, I guess ). I can also work with my door a little as you mentioned to hold some heat back. I will let you know how it all goes. With regards to heat coming through, at the 350 degree firing I read 108 degrees F = 42.2C with my laser thermometer on the outside of the pipe above the dome area. I plan on adding some Kaowool wool thermal glass insulation on it and then cladding it with 16 oz. copper sheet ( for looks ). Will send photos when done.
Sales.Service.Buy.Trade
Sheet Metal Equipment
& Related Tooling & Accessories
P.O. Box 263
Richfield, OH 44286
Phone & Fax 330.659.3799
—
Added by Rado: Sounds good to me. I wouldn’t worry about playing with the entry height at this point. Good fire that’s needed gives so much heat energy efficiently that you will only notice minimal difference. Yes, lowering the entry height temporarily with an easy removable material piece will work well; every time you plan to fit in a higher roasting pot etc. you just unblock this piece. I feel comfortable with max minimum height of 7-1/2″ = 190mm but this is mostly for pizza. I wouldn’t go lower than that. You can always introduce a draft by extending the chimney using a taller chimney pipe if it’s needed. I reckon you will need to introduce suction to the vent in there to nicely drag all fumes out throughout the chimney. By the way the copper casing on the outside you mentioned will remind me of a proper roofing job, no wonder you are in the business ( if with many rivets on this device it would also remind me the lovely machines looks from stories of author Jule Vern). I will be happy to see your work further. Yes, large cast block sections or fragments or tiles usually develop these movement lines, due to “the heat differences in material”, mostly on cooling down ( cooler on some side – shrunken usually in edges, and expanded middle – mostly in center or next to a heat source creates that. )
Good vibes,
Rado
—
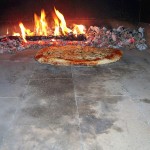 I am happy to inform you my oven has begun performing better. It seemed like I needed a break in period. I am getting a better grasp on fire size/heat requirement. I have attached full size pics ( to post ) of the oven complete, the flue topper and my second try, which was better then my first which was a disaster. My 3rd try and 4th try were home runs. The only thing I need to master now, is getting my pie’s off the peel. I use a lot of corn meal and flour, and can’t wait to long after it is sauced and topped to get it in the oven. And that is not with a thin dough.
 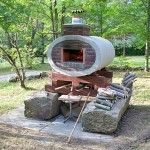 I’ve got some 14″ = 355.6 mm parchment circles on order and although not the official way to do it, I know they will make my life easier ( tired of throwing away product ). After all, the end result is what is important. This Polish boy wants to eat, not swear.
Marty
—
Added by Rado: Good to see your positive results Marty. The pizza oven looks groovy. About getting your pizza of the paddle. Nothing can be easier so to speak; decorate the rolled dough ( pizza base ) with tomato sauce and all topping as you like it. Do this on dry a large flat wood dusted with plain or wholemeal flour. Make sure no olive oil or tomatoes sauce gets under the pizza base or around the board as moisture make the sticky and no good. Next, simply slide dry pizza paddle/peel under the pizza as is on the board. Do not wait, instead, place the paddle into the oven and, jab-off the pizza out of the paddle with that quick sort of there-back-jabbing movement. All toppings will stay on the pizza base 99% of times.
Respond to the Oven in elliptical concrete drainage pipe article:
1 Comment
Sorry, the comment form is closed at this time.
I like your concept a lot. I have a round pipe available that I’d like to try. I’m really intrigued by the cast roof in your pipe, but can’t find any reference to what it’s made of, how you cast it, and if there are any locating/anchor pins holding it to the pipe. Are these details available somewhere? Thanks.
By Keith