Oven built on smaller footprint
Hi Rado
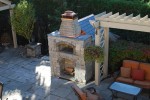
I finished the pizza oven a few weeks back so I wanted to send you a picture for -you can have a look at what we created.
If you remember;
I had the swishy oven concrete pad already poured in the ground but followed your suggestion to build the new 3G MTo design with cascading blocks off the back (for other builders – because the surface I had required to fit everything into the place was marginally smaller in length … in other words the original oven size was placed on a smaller surface by cascading blocks).
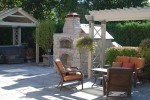
Photo of my oven (was taken from a window): 
It works perfectly. So happy about it. The cooking and baking in it is so different, so much better fun both in quality and in taste. Everybody is enjoying our new oven immensely.
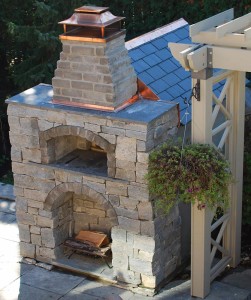
Here is a side view of the pizza oven.
The outer decorative cladding on this oven is typical of stacked fieldstone buildings and fences we have around in Ontario Canada. Thank you for all your input and the additional design consultations.
Jamie
in Pickering, Ontario Canada
Respond to the Oven built on smaller footprint article:
5 Comments
Sorry, the comment form is closed at this time.


Jamie, do you know how many 8 in X 8 in X 16 in Cinder Blocks have you used for your oven?
I would like to begin to plan my own oven project but currently have no idea how many concrete blocks to buy.
How about refractory fire clay bricks? How many of these did you end up using for your oven size?
Thanks,
Steve
By Steve
Hi Jamie, your ovwn looks very nice, good job. Are you stone mason? Work with stone looks very nice. What’s the inner and outer size of the oven? Regards Jarek.
By Jarek
Hi Jarek,
All the dimensions are exactly the same as the 3G MTO oven with the exception of the concrete pad which was originally made for the Rado Swishy design. The cascading blocks helped compensate for the 7″-8″ shorter concrete base pad that I already have made.
No I am not a stone mason but I enjoy learning every trade.
Best regards,
Jamie
By James
Hi Steve,
Sorry for the late reply.
You should use Rado’s guidelines and pictures for block qty and design.You can add up the block qty just by counting the blocks in the pictures. I would make 2 or three trips to the brick yard rather than trying to forecast the exact qty. Use what ever size you need to construct the pad staying as close to Rado’s plan as possible. You have to remember Rado s done this multiple times so he can plan qty etc. As a first timer you can’t be that accurate so save the stress and just order half or 3/4 what you think you need. You will end up going back anyway. Rado’s design is open to change and suggestions so don’t stress out trying to follow every dimension exactly. If you have questions he will reply. If you face what I faced regarding different brick and block sizing then I would say stay within 10-15% accuracy of Rado’s design and everything will work out. Best of luck! Take your time and don’t rush!! It is a serious and fun project!!! :)
By James
James, thank you! Further to your approach; When I want to be totally 100% clear visually what I am going to do, I temporarily arrange blocks or bricks on a garage floor. This gives me also opportunity to double check the new/final measurements or to create a quick drawing (if it’s needed.)
Or to adjust things further once a new logical idea arises, which is rather common for that to happen because it’s so much easier to visualize what and where will go.
By Rado