Wood fired family oven built in Austria
Dear Rado,
about 2 years ago my father in law decided to build a wood fire oven for backing our own bread. My girlfriend and I were very enthusiastic and immediately decided to help him. But we all had no idea how to build such an oven.
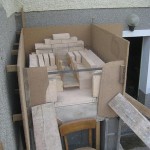
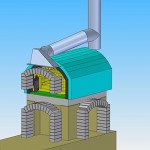
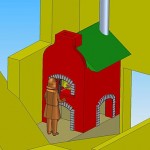
After some web research I found your page (www.traditionaloven.com) and it was amazing how many detailed information you placed there. I read all your instructions, summarized the most imported information and of course I ordered your CD’s with the detailed building pictures of traditional wood fire ovens. I gave the disk to my father in law as a present on father’s day (I don’t know if you know this tradition) and he was thrilled. Immediately we went into the garden to search for the best place for the oven. It was a very hard decision but in the end we all agreed to a place with very low space directly under the roof of the house. It was not sure if it is possible too build a oven at this place. Therefore I decided to develop a detailed plan in a CAD program with the true dimensions (see Backofen gesamt.jpg below among the images).
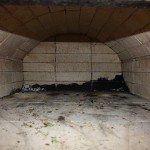
As I had no idea which dimensions fire bricks in Austria have, I had to find producers and bargainers which offer bricks with an approx dimension to yours. During this research I found different systems how to build the floor of the dome. Thus, I developed different variations of the dome’s floor. We decided to build the floor with so called Quick-boards because this was the cheapest and most easy solution for us (Boden mit Quickboardplatten_1.jpg). An other big problem was the wall and the eaves of the house. I did a long research for a cheap solution. But, I couldn’t find one. Because of that, we decided to buy an expensive stainless steel chimney.
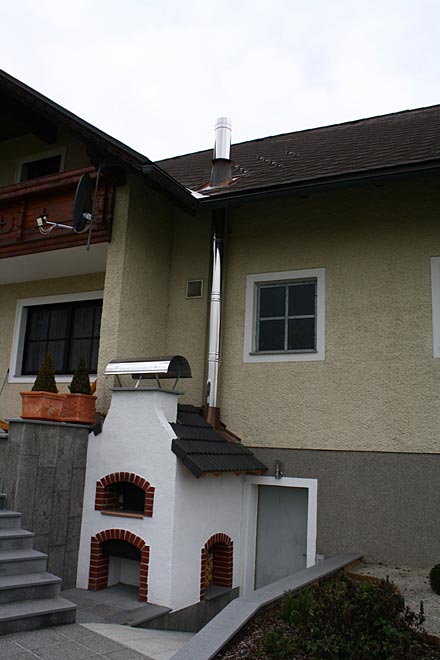
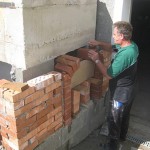
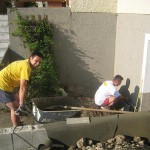
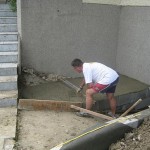
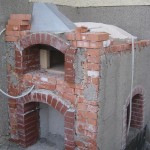
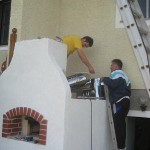
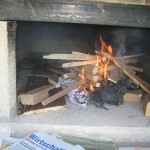
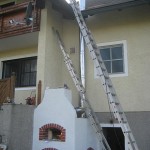
After this step everything has been clearly planed and we started the building process. We dug a hole, concreted the base, the oven base plate, the oven floor, the dome, the concrete cladding and the outside wall with the back insulation in between. (have a look at the pictures) We fired the oven very very low for drying. First days we burned only newspapers then we added small pieces of wood getting bigger day by day. Then, the stainless steel chimney was delivered and we could start with installing it. Because of the height of the houses’ roof this was a very thrilling piece of work. But thank god, there was no accident and we could first fire the oven to its full power. And, we baked the first bread in our new oven. This was the very best bread we have ever eat since then.
After we began installing some optical improvements to the oven and to the surroundings of the oven. This place got the most beautiful place for my father in law’s house. Every new visitor only says: “wow!! You really built it on your own? I also want such a cool wood oven!” Now, the oven is fired every 10th day and we bake all the bread we need on our own. We also bake lovely pizza (with the receipt on you page) (once we baked about 25 pizzas in an evening), roast goose and other meat, dry apples, tomatoes and chilli’s …
Thanks a lot for you great, detailed description of how to build such an oven. It was one of the best decisions we have ever made to build the oven with your description. To build this oven was a big adventure and in the end a very big success for all of us.
It would be nice to see some of our pictures on your gallery in the web.
Best wishes and regards from the whole family!
Best regards
Robert
Neufelden Austria
PS: Sorry for my poor English.
Respond to the Wood fired family oven built in Austria article:
7 Comments
Sorry, the comment form is closed at this time.
Dear Robert,
Howareyou?!
I always like to look on the lovely houses people live in around Austria. Last time we stayed in Vienna for 3 nights (we spent each of the days exploring the Schönbrunn Palace.) We loved it in the aspect that it has a huge history and we made heaps of photos there.
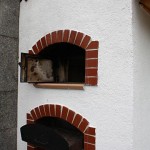
Very interesting house/oven project; thank you for sending us your oven photos, we love them. You guys look like a professional builders … don’t you?! The tall chimney workaround was a good idea. Does it create proper draft?, in this length it should produce a strong draught. Thank you for the explanations in your text, many people will find it useful. If you like, please email me also a text for each individual photo (2+ sentences describing it will be fine), I will add it in separately. Lots of people will see it, also Austrians. TO
gets daily unique visitors ~5.5K and in winter on your southern hemisphere the traffic gets even bigger as people have more time to read more. This NEW photo/articles gallery on the web site isn’t opened fully yet to the public, work is being done on it currently by my friend. Another 1 or 2 weeks, it’ll be better link into from other areas of the site.
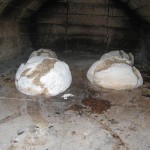
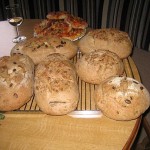
(Sorry my German language is virtually at zero – but it’s never too late to start to learn a new language.) On the photos I just sent you is 1.5kg heavy sourdough bread loaf.
Good vibes Mate,
Rado
By Rado
Dear Rado,
I agree with you, Vienna is a really nice city and especially
Schönbrunn is very beautiful.
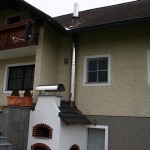
We are not at all professional builders, but we gave it a go anyways. The tall chimney has an inner diameter of 200mm an insulation layer of approx. 50mm in the middle and an outer diameter of 300mm. The length of the chimney is about 5.5m so there is enough draft!
Thank you for placing the photos on your webpage. In the email I sent you some explanations for each picture.
Your bread looks very delicious. Which flour do you use? Our normal bread loafs weight at max 1kg. But on a normal baking day we need about 5-7 kg of flour. Which means we produce about 10-12 loafs of bread. We normaly add sourdough to every sort of bread. With sourdough bread one gets more taste and in Austria we love this.
I currently look at your new page. It’s getting very nice and I could already find my text and all the pictures. You are so fast! Are you working all day long?
Thanks a lot for all!
All the best to you!
regards
Robert
By Robert
Hi Robert!
Thanks for sending the photo descriptions, I will add it in now. Yes I acted promptly because I am not on outdoor job today, the weather is getting too hot outside now. I am glad that you like my bread, I bet yours is just as nice.
I also mix in sourdough which I keep from the most previous batch. And I use unbleached fine wheat flour that has more than 11grams of protein amount /per 100g of flour (or more than 11% of protein in the flour.) Believe or not I buy this flour in Aldi because other shops sell flours with only 10% in protein (I don’t use flour type 00, finest grind 00, zero zero. It would work great too but it’s twice as expensive, the difference is small so what’s the point!) Aldi stores here sell mostly Australian made products, and by this I mean flour, dairy, meats, eggs. Plus this flour is also local and it performs perfectly for baking and also for making pizza dough. It’s much cheaper than
fine white flour sold in other shops or our supermarkets (how is that for the extreme competition? Suits us fine.) But, I also add 30% of rye flour into my bread, salt, 4 teaspoons dry yeast (it is 12 grams), 2 spoons of soy flour, vitamin C (~ 1/5 of a spoon I get it in health store in powder form), Enzyme if I have made it ahead (basically it’s water from cooking skins from pealed potatoes added into the total amount of water – heaps of skins slowly boiled in little amount of water so it’s concentrated, slowly simmered in an old stainless
steel pot covered with lid when firing and heating op oven), also little of Folic acid – Thiamine. We filter all water for consuming at home. For all dry ingredients amount of exactly 1200 grams already mixed I use exactly 865 milliliters of water (goes 1 half water of room temperature and 1 half hot water minutes after boiling, hence the enzyme liquid made from potato skins which are strained out using any small kitchen sieve.) I would like to replace the vitamin C with an amount of juice from kiwi fruit … for a test one day. Baking in ~200 Degrees Celsius, plus minus some degrees is all right. Now the time, if I bake the large loaf you saw on the photo I sent you, it’s from 1.2Kg of dry ingredients, I bake it for 60 minutes. If I divide the dough from this same amount in half as to make 2 smaller breads, I leave them baking for 35 minutes. Basically I take these type of breads (with added rye) out from the oven when they already look very dark brown. Oh, and before they go into the oven they get well sprayed with salty water from the small hand held plastic spray bottle. When the breads get out after baking, they appear as if having strong crust but this changes within 2-3 hours as they cool down under a cover. Can be cut with large knife in lovely way. This bread last 4 days and some can go into the freezer for the second half of a week … if you don’t eat it all in the same day.
So this is how I bake my bread. I will make a whole page or pages about it. The book shown on the bottom of this oven building details page says I should use a ‘wheaten flour‘. But I don’t know what that “wheaten flour” is so I use the flour I mentioned here above, it has the higher protein content so probably it is what I need to use :) cause I am happy with it!
By Rado
Just one more point. For those family home economists that can see a benefit in it. Have you noticed the timing of 30 to 35 minutes for baking the common size loafs? If the dough is divided in half, it’s just for that size. You can place these amounts in standard bread baking pans and place 6-8 of them at once in an oven of a size a small kitchen oven has. 35 minutes baking only. If it’s a kitchen electric oven, heat it up to 230C, place all the bread pans in and after that change the oven temperature knob back to 200C. It’s always useful to hang in the oven a stainless steel oven thermometer so you can read the temperature as it really is. It is a very delicious bread. Also, it can be picked up from your place while it is still hot. A bread flour bought in large pack can be used also. How many can you bake on 34″ x 40″ large surface in a wood fired bread oven when reloading batches? Just an idea.
By Rado
I just had to say I have spent the morning looking at wood fired oven ideas and yours is by far the most beautiful. Quite the attractive oven outcome you built. Most are just for functionality and quite plane looking. Well done job!!!
Thanks you for sharing,
Rob
By Rob P
The brotbacken, your home made breads, looks very delicious :)
By chimney pipe
I love the creative way you have constructed your chimney to go out through the house roof. I will be copying this idea to get the flue to rise from the back of my oven as the front half will be inside a gazebo and we don’t want to knock through the roof!
How did you join the flue to the firebox? Did you cover the horizontal pipe with insulation as well?
Thanks for sharing the CAD pictures they are very useful!
Kind regards
Nancy from England.
By Nancy