Concrete slab, walls, oven, wall rendering technique.
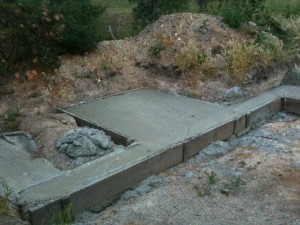 The base slab as part of a long wall. After ordering the CD’s from Rado I started building with the slab in November 2009 and had the first firings in March 2010. Because this is part of a larger south-facing garden project we decided to build it into one of the walls. It’s been a stimulating and at times challenging project although now we’ve had the first pizzas it has been worth it. Now I’m onto the new learning curve not just of how the oven behaves but also dough making and baking techniques.
 Here are some images of the build. The early building stage. You can see the finished oven and the cooking start!
I decided to create a walled garden with the oven as part of the wall.
Vermiculite under slab. 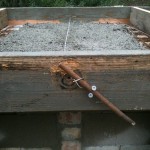 Here’s the vermiculite insulation layer that goes under the hearth slab. This was before I found a good place to buy the stuff and paid an exorbitant amount for it from a garden supplies place. The best place to buy material for the oven was from the refractory company where we found seconds firebricks, got them through the Fire Brick Refractory Company based in Melbourne for which I have provided their link.
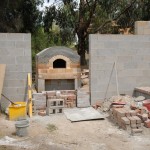 Main oven. This part happened fairly quickly, but by the next pic it still seemed the finish was a long way off.
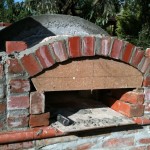 Front arch. Probably my worst arch was the most visible one. I had thought I was getting fairly proficient in this art too.
The rougher, with more uneven and irregular surface, the walls are built, the better effect the oven receives.
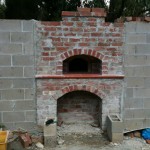 Thank goodness I decided to render so I can cover the less than beautiful brickwork. Walls ready for the cement render.
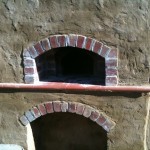 First coat of render. My 17 year old son has been putting the first coat of render on the bricks. Lots of work has happened here.
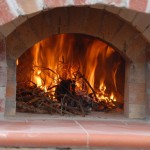
First drying fire. So there is the first part – next part is to start cooking! Culinary arts in wood fired pizza oven by Keith. He will be able to run cooking classes soon!
Respond to the Concrete slab, walls, oven, wall rendering technique. article:
3 Comments
Sorry, the comment form is closed at this time.
[…] Keith’s wood fired oven » […]
Pingback Culinary arts with chicken and cibatta bread baking in our pizza oven
Thanks for this the article covers just that what I intend to make, some brickwork innovation as in a proficient art of brick/block with a roughly applied cement render or plastering. Keith
By Render and plastering
I am planning a barbecue pit, the concrete slab is going to be 1.20m X 0.80m
Can I use the vermiculite + portland cement + water (5:1:1) + 8mm rebar for the slab structure? It is not clear to me the vermiculite concrete should be used for structural purposes or ONLY for insulation purposes.
Thanks for your attention.
Antonio
By Antonio